Wild Rift: RENGAR Build Guide (7.3A)

League of Legends: Wild Rift RENGAR, role - Assassin / Fighter. Use the guidelines to take your RENGAR Wild Rift champion play style to the next level. Study in detail the build of items, runes, spells, skills that need to be developed in the first place. In order to find out what position RENGAR is in the rating table, go to the - Tier List page.
 62 (3.5) 62 (3.5) |  630 (136) 630 (136) |  9 (0.7) 9 (0.7) |
 0.8 (0.015) 0.8 (0.015) |  0 (0) 0 (0) |  0 (0) 0 (0) |
 355 (0) 355 (0) |  40 (4.5) 40 (4.5) |  43 (2) 43 (2) |
 200% (0) 200% (0) |

(PASSIVE) UNSEEN PREDATOR
If Rengar is in brush or camouflaged, leaps to the target within his next attack.
If Rengar's Ferocity is lower than 4 and he doesn't have any Ferocity gained from attacks during the attack, he gains 1 Ferocity. Bonetooth Necklace: Gains 4/8/12/16/20% Attack Damage for each unique champion takedown (+4/8/12/16/20% at takedown). Each enemy champion only provides this once.
- Gains 1 Ferocity upon casting a basic ability (if casting Savagery, Rengar must hit a target with an empowered attack to gain this bonus).
- Reaching 4 Ferocity empowers his next basic ability. Casting the empowered ability does not refresh thee basic ability's cooldown.
- Gains 30% Movement Speed (increases at level 1/6/11) for 1.5 seconds upon casting an empowered ability.
- All Ferocity is lost 8 seconds after leaving combat.

(Q) SAVAGERY
 5,5/5/4,5/4s
Rengar's next 2 attacks within 3 seconds gain 40% Attack Speed. The first attack is empowered to deal an additional 44 physical damage (40/80/120/160 + 5/10/15/20% ) and will Critically Strike.
Rengars Critical Rate also increases the damage of the first attack by 0% - 55%, reaching maximum bonus damage gaines this way at 100% Critical Rate. Ferocity: Gains 40%–115% Attack Speed for 5 seconds instead. The first attack deals an additional 65 physical damage (40/80/120/160 + 40% ) instead.
Deals 60% damage to turrets.

(W) BATTLE ROAR
16/14/12/10s
Rengar roars, dealing 60 magic damage (60/100/140/180 + 80%  ) and healing for 60% of damage taken in the last 2 seconds.
 Ferocity: Deals 80 magic damage (80/100/110/130 + 80% ) instead. Also restores Health by 60% of damage taken in the last 2 seconds and removes all crowd control effects from himself.
Damage from a monster restores Health by 100% of the damage taken instead.

(E) BOLA STRIKE
10s
Throws a bola that deals 70 physical damage (70/130/190/250 + 70% bonus ) and slowing the target struck by 30/50/70/90% for 1.75 seconds. The bola also reveals the surrounding area for 2 seconds. Ferocity: Deals 75 physical damage (75/110/145/180 + 70% bonus ) and roots the target for 1.75 seconds. Also reveals the target and surrounding area for 2 seconds.
Bola Strike can be cast while Rengar is leaping.

(R) THRILL OF THE HUNT
85/75/65s
 Gains 40/50/60% Move Speed and reveals the nearest enemy champion for 12/14/16 seconds.
Rengar becomes camouflaged after 1 second and his next attacks shreds the target's armor by 16/24/32 for 4 seconds.
RENGAR Meta Overview — Ranks & Performance Analytics
This meta overview presents RENGAR’s ranked performance across different roles and skill tiers. The data includes tier placement, win rate, pick rate, ban rate, and short-term trends, allowing you to evaluate her current strength and draft priority. Statistics are synced with rank buckets and role selection, helping you understand where RENGAR performs best and how her impact changes in the evolving Wild Rift meta.
 Confidence Low
Jungle RENGAR Build items and runes
The information below will help you get familiar with the game on the Jungle Line RENGAR. We have prepared a items builds, runes, summoner spells and ability order for a comfortable game. Situational options for replacing items and runes are also available to you.
Key items
 Long Sword. Next, you should pay attention to whether your mobility champion is enough, our further actions will depend on this. If it is hard for you to dodge the enemy's skills or you want to roam on neighboring lines, then it is better to buy
  Boots of Speed at an early stage.
Long Sword +12 Attack Damage
 500
500

Essence Reaver
Attacks casting an ability, your next attack deals bonus damage +50 Attack Damage +25% Critical Rate +20 Ability Haste
Spellblade: Using an ability causes your next attack within 10s to deal bonus physical damage equal to 135% base AD plus 0–80 (increased by 0.8 per 1% Critical Rate) and restore 50% of this damage as Mana. (1.5s Cooldown) 3000
Essence Reaver TIPS: This item combines Attack Damage, Critical Strike Chance, and Ability Haste, creating strong synergy between abilities and basic attacks. Using an ability empowers your next attack with bonus physical damage that becomes more effective in Critical Strike builds, while part of the damage dealt restores Mana. An excellent choice for AD champions who constantly weave abilities and basic attacks together and need reliable Mana sustain.

Boots of Dynamism
Attack Damage, Armor Pen +15 Attack Damage +10 Armor Penetration
 +45 Move Speed 1200
Boots of Dynamism TIPS: These boots increase your physical damage by providing bonus Attack Damage and armor penetration. They are especially effective during the early stages of the game, allowing you to cut through enemy defenses and win trades more easily. They are an excellent choice for marksmen, assassins, and fighters looking to maximize their damage output and eliminate enemies more efficiently.
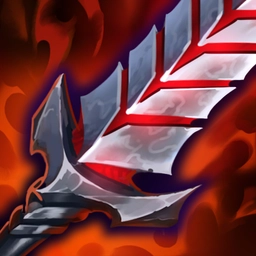
Bloodthirster
Gain Lifesteal and convert excess healing into a shield +75 Attack Damage +15% Lifesteal
Ichorshield: Convert excess healing from your Lifesteal to a shield that absorbs up to 165–345 damage. 3200
Bloodthirster TIPS: This item significantly increases physical damage and Lifesteal, providing strong health recovery from attacks. Excess healing from Lifesteal is converted into a protective shield, allowing you to build additional protection before entering a fight. An excellent choice for marksmen and other AD champions who need high damage, sustained combat power, and extra survivability.
Boots of Dynamism
Attack Damage, Armor Pen +15 Attack Damage +10 Armor Penetration +45 Move Speed 1200
Boots of Dynamism TIPS: These boots increase your physical damage by providing bonus Attack Damage and armor penetration. They are especially effective during the early stages of the game, allowing you to cut through enemy defenses and win trades more easily. They are an excellent choice for marksmen, assassins, and fighters looking to maximize their damage output and eliminate enemies more efficiently.

Armorcrusher Boots
Gain out-of-combat Movement Speed +25 Attack Damage +12 Armor Penetration +6% Armor Penetration +45 Move Speed
Cloudwalker: Gain 20 out-of combat Move Speed. 2200
Armorcrusher Boots TIPS: These boots greatly increase your physical damage by providing bonus Attack Damage along with both flat and percentage armor penetration. The additional out-of-combat movement speed allows you to rotate around the map faster, chase enemies more effectively, and respond to fights more quickly. They are an excellent choice for marksmen, assassins, and fighters who value high mobility and maximum damage against armored targets.
Essence Reaver (Attacks casting an ability, your next attack deals bonus damage) as your first item, followed by Boots of Dynamism (Grants Attack Damage and Armor Penetration) (sometimes it will still be better to build a boot as the first item, which significantly increases the mobility of your champion) the third key element in our build is Bloodthirster (Gain Lifesteal and convert excess healing into a shield).
Maybe now it's time to think about upgrading your boot, invest in
Armorcrusher Boots (Gain out-of-combat Movement Speed).
The remaining last three items are situational, of course you can use the example builds above. But for a more effective game you will need to pay attention to the situation on the battlefield.
Essence Reaver
Attacks casting an ability, your next attack deals bonus damage +50 Attack Damage +25% Critical Rate +20 Ability Haste
Spellblade: Using an ability causes your next attack within 10s to deal bonus physical damage equal to 135% base AD plus 0–80 (increased by 0.8 per 1% Critical Rate) and restore 50% of this damage as Mana. (1.5s Cooldown) 3000
Essence Reaver TIPS: This item combines Attack Damage, Critical Strike Chance, and Ability Haste, creating strong synergy between abilities and basic attacks. Using an ability empowers your next attack with bonus physical damage that becomes more effective in Critical Strike builds, while part of the damage dealt restores Mana. An excellent choice for AD champions who constantly weave abilities and basic attacks together and need reliable Mana sustain.
Boots of Dynamism
Attack Damage, Armor Pen +15 Attack Damage +10 Armor Penetration +45 Move Speed 1200
Boots of Dynamism TIPS: These boots increase your physical damage by providing bonus Attack Damage and armor penetration. They are especially effective during the early stages of the game, allowing you to cut through enemy defenses and win trades more easily. They are an excellent choice for marksmen, assassins, and fighters looking to maximize their damage output and eliminate enemies more efficiently.
Bloodthirster
Gain Lifesteal and convert excess healing into a shield +75 Attack Damage +15% Lifesteal
Ichorshield: Convert excess healing from your Lifesteal to a shield that absorbs up to 165–345 damage. 3200
Bloodthirster TIPS: This item significantly increases physical damage and Lifesteal, providing strong health recovery from attacks. Excess healing from Lifesteal is converted into a protective shield, allowing you to build additional protection before entering a fight. An excellent choice for marksmen and other AD champions who need high damage, sustained combat power, and extra survivability.

Mortal Reminder
Armor Penetration (%) and reduced enemy healing +35 Attack Damage +30% Armor Penetration +25% Critical Rate
Sepsis: Dealing physical damage to enemy champions applies 50% Grievous Wounds for 3 seconds.
Grievous Wounds reduces the effectiveness of Healing and Regeneration effects. 3000
Mortal Reminder TIPS: This item combines Attack Damage, percentage Armor Penetration, and Critical Strike Chance, allowing you to effectively deal with armored enemies. Dealing physical damage to enemy champions applies Grievous Wounds, reducing the effectiveness of their healing and health regeneration. An excellent choice against teams with high Armor, healing, and regeneration.

Infinity Edge
Increases Critical Strike Damage +75 Attack Damage +25% Critical Rate
Infinity: Critical Strikes deal 230% damage instead of 200%. 3400
Infinity Edge TIPS: This item significantly increases Attack Damage and Critical Strike Chance while also increasing the damage dealt by Critical Strikes. An excellent choice for marksmen and other AD champions focused on Critical Strike builds, especially in the later stages of the game when a high Critical Strike Chance allows you to make the most of its damage amplification.

Guardian Angel
Revives at death +45 Attack Damage +40 Armor
Resurrect: Upon taking lethal damage, restores 50% Health and 100% Mana after 4 seconds of stasis. (180s Cooldown) 3200
Guardian Angel TIPS: This item is perfect for champions who need a second chance in teamfights. It is especially effective against champions with high burst damage, such as Zed, Syndra, or Zoe, as well as against strong diving champions like Camille, Kha'Zix, or Lee Sin. The Resurrection effect allows you to return to the fight after taking lethal damage, restoring health and mana, giving you a chance to continue fighting and assist your team even in critical moments.
Situational items





Mortal Reminder
Armor Penetration (%) and reduced enemy healing +35 Attack Damage +30% Armor Penetration +25% Critical Rate
Sepsis: Dealing physical damage to enemy champions applies 50% Grievous Wounds for 3 seconds.
Grievous Wounds reduces the effectiveness of Healing and Regeneration effects. 3000
Mortal Reminder TIPS: This item combines Attack Damage, percentage Armor Penetration, and Critical Strike Chance, allowing you to effectively deal with armored enemies. Dealing physical damage to enemy champions applies Grievous Wounds, reducing the effectiveness of their healing and health regeneration. An excellent choice against teams with high Armor, healing, and regeneration.
Dominik’s Regards
Armor Pen and bonus damage +35 Attack Damage +35% Armor Penetration +25% Critical Rate
Giant Slayer: Deal bonus damage based on the enemy champion's bonus Health, up to 12% bonus damage when the enemy champion has 1.200 bonus Health. 3300
Dominik’s Regards TIPS: This item combines Attack Damage, percentage Armor Penetration, and Critical Strike Chance, allowing you to effectively deal with durable enemies. Your damage is further increased against champions with large amounts of bonus Health. An excellent choice for marksmen and other AD champions against tanks and fighters who stack Armor and Health.
Dominik’s Regards — This item combines Attack Damage, percentage Armor Penetration, and Critical Strike Chance, allowing you to effectively deal with durable enemies. Your damage is further increased against champions with large amounts of bonus Health. An excellent choice for marksmen and other AD champions against tanks and fighters who stack Armor and Health.
Mortal Reminder
Armor Penetration (%) and reduced enemy healing +35 Attack Damage +30% Armor Penetration +25% Critical Rate
Sepsis: Dealing physical damage to enemy champions applies 50% Grievous Wounds for 3 seconds.
Grievous Wounds reduces the effectiveness of Healing and Regeneration effects. 3000
Mortal Reminder TIPS: This item combines Attack Damage, percentage Armor Penetration, and Critical Strike Chance, allowing you to effectively deal with armored enemies. Dealing physical damage to enemy champions applies Grievous Wounds, reducing the effectiveness of their healing and health regeneration. An excellent choice against teams with high Armor, healing, and regeneration.
Serpent's Fang
Anti-Shielding +50 Attack Damage +10 Ability Haste
Stab: +15 Armor Penetration.
Shield Reaver: Dealing damage to an enemy champion reduces any shields they gain for 3s. Melee champions apply (10% of bonus AD + 40)% shield reduction, capped at 60%; while ranged champions apply (10% of bonus AD + 25)% shield reduction, capped at 45%. When you damage an enemy who is unaffected by Shield Reaver, all shields on them are reduced by the same values. 2800
Serpent's Fang TIPS: This item is perfect for assassins and champions who face enemies with a lot of shields. It provides bonuses to attack damage and ability haste, along with increased armor penetration, making it effective against well-protected enemies. The "Shield Reaver" effect allows you to reduce the effectiveness of shields gained by enemy champions, depending on your bonus attack damage, helping to quickly break through shields. This item is especially useful against champions who rely on shields for defense, such as Lux, Braum, and others.
Serpent's Fang — This item is perfect for assassins and champions who face enemies with a lot of shields. It provides bonuses to attack damage and ability haste, along with increased armor penetration, making it effective against well-protected enemies. The "Shield Reaver" effect allows you to reduce the effectiveness of shields gained by enemy champions, depending on your bonus attack damage, helping to quickly break through shields. This item is especially useful against champions who rely on shields for defense, such as Lux, Braum, and others.
Guardian Angel
Revives at death +45 Attack Damage +40 Armor
Resurrect: Upon taking lethal damage, restores 50% Health and 100% Mana after 4 seconds of stasis. (180s Cooldown) 3200
Guardian Angel TIPS: This item is perfect for champions who need a second chance in teamfights. It is especially effective against champions with high burst damage, such as Zed, Syndra, or Zoe, as well as against strong diving champions like Camille, Kha'Zix, or Lee Sin. The Resurrection effect allows you to return to the fight after taking lethal damage, restoring health and mana, giving you a chance to continue fighting and assist your team even in critical moments.
Death's Dance
Delays damage taken +50 Attack Damage +45 Armor +15 Ability Haste
Cauterize: 30% of all physical damage and magic damage received (12% for ranged champions) is dealt to you over 3 seconds as true damage instead.
Defy: When a champion that you damaged within 3 second(s) dies, cleanse Cauterize's remaining damage pool and restore Health equal to 90% bonus AD over 2 second(s). 3300
Death's Dance TIPS: This item combines Attack Damage, Armor, and Ability Haste, significantly improving survivability in extended fights. A portion of incoming physical and magic damage is delayed over time, reducing immediate burst damage. Participating in a champion takedown clears the remaining delayed damage and restores Health. An excellent choice for fighters and other AD champions who need to survive heavy damage and keep fighting after securing a takedown.
Death's Dance — This item combines Attack Damage, Armor, and Ability Haste, significantly improving survivability in extended fights. A portion of incoming physical and magic damage is delayed over time, reducing immediate burst damage. Participating in a champion takedown clears the remaining delayed damage and restores Health. An excellent choice for fighters and other AD champions who need to survive heavy damage and keep fighting after securing a takedown.
Guardian Angel
Revives at death +45 Attack Damage +40 Armor
Resurrect: Upon taking lethal damage, restores 50% Health and 100% Mana after 4 seconds of stasis. (180s Cooldown) 3200
Guardian Angel TIPS: This item is perfect for champions who need a second chance in teamfights. It is especially effective against champions with high burst damage, such as Zed, Syndra, or Zoe, as well as against strong diving champions like Camille, Kha'Zix, or Lee Sin. The Resurrection effect allows you to return to the fight after taking lethal damage, restoring health and mana, giving you a chance to continue fighting and assist your team even in critical moments.
Maw of Malmortius
Converts damage from attacks into a magic shield +55 Attack Damage +45 Magic Resistance +10 Ability Haste
Lifeline: Upon taking Magic Damage that would reduce your Health to below 35%, gain  +10% Omni Vamp. until the end of combat and a magic shield that absorbs 220-530 Magic Damage for 3s. (70s Cooldown) 3000
Maw of Malmortius TIPS: This item provides a mix of damage, magic resistance and ability haste, but its core value is the anti-burst passive: when hit by a dangerous burst of magic damage, you instantly gain a strong protective shield and a temporary lifesteal/omnivamp effect that lasts through the fight. It lets you survive big AP detonations and re-enter skirmishes quickly. Best for assassins, bruisers and AD champions who need to survive enemy magic burst and power through fights.
Maw of Malmortius — This item provides a mix of damage, magic resistance and ability haste, but its core value is the anti-burst passive: when hit by a dangerous burst of magic damage, you instantly gain a strong protective shield and a temporary lifesteal/omnivamp effect that lasts through the fight. It lets you survive big AP detonations and re-enter skirmishes quickly. Best for assassins, bruisers and AD champions who need to survive enemy magic burst and power through fights.
Guardian Angel
Revives at death +45 Attack Damage +40 Armor
Resurrect: Upon taking lethal damage, restores 50% Health and 100% Mana after 4 seconds of stasis. (180s Cooldown) 3200
Guardian Angel TIPS: This item is perfect for champions who need a second chance in teamfights. It is especially effective against champions with high burst damage, such as Zed, Syndra, or Zoe, as well as against strong diving champions like Camille, Kha'Zix, or Lee Sin. The Resurrection effect allows you to return to the fight after taking lethal damage, restoring health and mana, giving you a chance to continue fighting and assist your team even in critical moments.
Edge of Night
Blocks an enemy ability +250 Max Health +50 Attack Damage
Gouge: +12 Armor Penetration.
Annul: Grants a spell shield that blocks the next hostile ability. This spell shield refreshes upon leaving combat with enemy champions. (35 second cooldown) 3000
Edge of Night TIPS: This item is perfect for champions who need a mix of offense and defense. It provides bonuses to maximum health and attack damage, along with increased armor penetration to help you shred through enemy defenses. The "Annul" effect grants you a spell shield, blocking the next enemy ability. This spell shield refreshes when leaving combat with enemy champions, making the item a great choice for champions who need protection from crowd control and to engage in fights, such as Ashe, Lux, or Morgana.
Edge of Night — This item is perfect for champions who need a mix of offense and defense. It provides bonuses to maximum health and attack damage, along with increased armor penetration to help you shred through enemy defenses. The "Annul" effect grants you a spell shield, blocking the next enemy ability. This spell shield refreshes when leaving combat with enemy champions, making the item a great choice for champions who need protection from crowd control and to engage in fights, such as Ashe, Lux, or Morgana.Summoner Spells
 Flash (Teleport a short distance) and
  Smite as your Summoner Spells.
Flash
Teleport a short distance forward or towards the aimed direction.
Cooldown: 150s
Smite
Jungle Expertise:
On cast, Smite deals 600 true damage to minions and monsters and causes your attacks against a monster to deal 30 true damage( ) every second in an area around them for 2 seconds. This damage is increased by 10% bonus Attack Damage, 12% bonus Ability Power
 , 25% bonus Armor, 25% bonus Magic Resist, and 4% bonus Health.
Deals 10% more damage against monsters.
Hunter's Resource:
- Gain Hunter's Resource stacks over time. After clearing a monster camp, 1 stack(s) are consumed for 40 bonus gold.
- Restore 5–35 Health every second () when attacking monsters. Health restored is based on your missing Health.
- When Smite is equipped, take only 50% damage from non-epic monsters.
Upgraded Smite:
- After consuming 8 and 20 stacks, Smite upgrades, increasing its damage to 1,000 and 1,400 respectively.
- When Smite is fully upgraded, gain Movement Speed while in the jungle or river: 10% Movement Speed out of combat, and 5% Movement Speed in combat.
- Upgraded Smite can be cast on champions to deal 40 true damage damage and steal 25% of their Movement Speed for 2 seconds.
Gains one charge every 45 seconds, up to a max of 2.
Cooldown: 45s
Runes BUILD
 First Strike (Gain gold and bonus damage by dealing damage in battle first.) as your keystone, followed by
  Brutal (Attacks deal bonus damage to enemy champions.),
  Coup de Grace (Increases damage dealt to enemy champions with low Health.) and
  Legend: Alacrity (Gains Attack Speed.) in the primary tree, as well as
  Sudden Impact (After dashing or exiting invisibility/stealth, your next damaging attack or ability deals true damage on hit. The attack/ability gains bonus effects at higher levels.) in the secondary tree. Below you can see possible options for replacing runes.
First Strike
Initiate, Damage Amplification, Bonus Gold
Initiating combat with an enemy champion or dealing damage to them within 0.25s of engaging them in combat grants 10 gold and First Strike for 3s, allowing you to deal 7% bonus true damage to them. After the effect ends, gain bonus gold based on the bonus damage dealt for its duration.
If you do not deal damage to the enemy champion within 0.25s of engaging them in combat, First Strike will go into a 10-second cooldown.
Bonus gold:
Melee: 65% of bonus damage.
Ranged: 45% of bonus damage.
Cooldown: 20-30s
Brutal
Attacks deal on-hit damage
Attacks deal (5 + 6% bonus + 3% ) bonus adaptive damage to enemy champions.
Coup de Grace
Increase damage to low Health enemies
Your attacks deal 8% bonus adaptive damage to enemy champions with less than 40% Health.
Legend: Alacrity
Increase bonus Attack Speed
Gains 3% Attack Speed. Takedown monsters, enemy champions, or minions to gain up to an additional 18% Attack Speed.
Sudden Impact
Triggers when in stealth or dashing
Damaging an enemy champion deals a bonus 15-65 true damage after using a dash, leap, blink, teleport, or when exiting stealth for 4s.
The damaging attack/ability gains bonuses at higher levels:
Level 5: Deal an additional 5 true damage.
Level 9: Deal an additional 5 true damage and gain 10% Movement Speed for 1.5s after dealing the damage.
Cooldown: 10s
Situational Runes




Coup de Grace
Increase damage to low Health enemies
Your attacks deal 8% bonus adaptive damage to enemy champions with less than 40% Health.
Cut Down
Deal more damage to high Health enemies
Your attacks deal 6.57% bonus adaptive damage to enemy champions with more than 60% Health.
Cut Down — This rune increases damage against high-health targets, helping you deal with tanky enemies more effectively. It is ideal for champions who rely on consistent damage output, especially against tanks and durable fighters. It works best on marksmen and some fighters where efficiently shredding high-health targets is important.
Sudden Impact
Triggers when in stealth or dashing
Damaging an enemy champion deals a bonus 15-65 true damage after using a dash, leap, blink, teleport, or when exiting stealth for 4s.
The damaging attack/ability gains bonuses at higher levels:
Level 5: Deal an additional 5 true damage.
Level 9: Deal an additional 5 true damage and gain 10% Movement Speed for 1.5s after dealing the damage.
Cooldown: 10s
Overgrowth
Increase max Health
For every 3 enemy minions or 3 monster(s) killed nearby, permanently gain 3 max Health. Max Health can be increased indefinitely this way. Gain an additional 3% max Health upon reaching 30 stacks.
Overgrowth — The rune increases your maximum health permanently with each nearby minion or monster kill. It is useful for most champions, including fighters, tanks, and junglers, who actively farm and frequently engage in fights. The rune helps improve survivability by stacking health over time, making it a great choice for champions who rely on increasing their maximum health for prolonged battles.
Sudden Impact
Triggers when in stealth or dashing
Damaging an enemy champion deals a bonus 15-65 true damage after using a dash, leap, blink, teleport, or when exiting stealth for 4s.
The damaging attack/ability gains bonuses at higher levels:
Level 5: Deal an additional 5 true damage.
Level 9: Deal an additional 5 true damage and gain 10% Movement Speed for 1.5s after dealing the damage.
Cooldown: 10s
Transcendence
Reduces ability cooldowns
Gain a bonus when reaching the following levels:
At level 1, gain 5 Ability Haste;
at level 5, gain bonus 5 Ability Haste;
at level 9, after Basic Ability hit the target, reduce 8% the ability's cooldown time.
Cooldown: 8s
Transcendence — This rune reduces ability cooldowns and makes gameplay smoother by allowing more frequent skill usage. It is ideal for champions who rely heavily on abilities and are constantly involved in fights or trades. It works best on mages, supports, and some fighters where maintaining a high tempo through ability usage is essential.
Sudden Impact
Triggers when in stealth or dashing
Damaging an enemy champion deals a bonus 15-65 true damage after using a dash, leap, blink, teleport, or when exiting stealth for 4s.
The damaging attack/ability gains bonuses at higher levels:
Level 5: Deal an additional 5 true damage.
Level 9: Deal an additional 5 true damage and gain 10% Movement Speed for 1.5s after dealing the damage.
Cooldown: 10s
Celerity
Increase Movement Speed
Gain 2% Movement Speed. All Movement Speed bonuses on you are also increased by 7%.
Celerity — This rune provides a steady movement speed boost and amplifies any other movement speed bonuses you gain. It turns brief dashes and speed bursts into a more sustained advantage—helping you engage, disengage, and maintain better positioning in fights. Great for mobile champions, roamers, and anyone who wants stronger kiting and map presence.Skills Order
(Q) SAVAGERY
5,5/5/4,5/4s
Rengar's next 2 attacks within 3 seconds gain 40% Attack Speed. The first attack is empowered to deal an additional 44 physical damage (40/80/120/160 + 5/10/15/20% ) and will Critically Strike.
Rengars Critical Rate also increases the damage of the first attack by 0% - 55%, reaching maximum bonus damage gaines this way at 100% Critical Rate.Ferocity: Gains 40%–115% Attack Speed for 5 seconds instead. The first attack deals an additional 65 physical damage (40/80/120/160 + 40% ) instead.
Deals 60% damage to turrets.
(Q) SAVAGERY
(W) BATTLE ROAR
16/14/12/10s
Rengar roars, dealing 60 magic damage (60/100/140/180 + 80% ) and healing for 60% of damage taken in the last 2 seconds.Ferocity: Deals 80 magic damage (80/100/110/130 + 80% ) instead. Also restores Health by 60% of damage taken in the last 2 seconds and removes all crowd control effects from himself.
Damage from a monster restores Health by 100% of the damage taken instead.
(W) BATTLE ROAR
(E) BOLA STRIKE
10s
Throws a bola that deals 70 physical damage (70/130/190/250 + 70% bonus ) and slowing the target struck by 30/50/70/90% for 1.75 seconds. The bola also reveals the surrounding area for 2 seconds.Ferocity: Deals 75 physical damage (75/110/145/180 + 70% bonus ) and roots the target for 1.75 seconds. Also reveals the target and surrounding area for 2 seconds.
Bola Strike can be cast while Rengar is leaping.
(E) BOLA STRIKE
(R) THRILL OF THE HUNT
85/75/65s
Gains 40/50/60% Move Speed and reveals the nearest enemy champion for 12/14/16 seconds.
Rengar becomes camouflaged after 1 second and his next attacks shreds the target's armor by 16/24/32 for 4 seconds.
(R) THRILL OF THE HUNT
Jungle RENGAR Counters
We have prepared lists of champions that can really annoy you during a match with the game on the Jungle RENGAR. We have also prepared a list of champions with whom you will be comfortable being on the same team. These lists are relative and depend greatly on your level of play, the skills of your allies and opponents. Do not forget that each situation is individual!
Threats





Synergies






Jungle RENGAR Counter Items
We have prepared a list of items and spells that will help counter Jungle RENGAR in a given situation. Buy items wisely, only if it is really necessary for a specific situation!
Armor
Items that reduce Auto Attacks (AA) / Physical Damage.

Plated Steelcaps
Reduces damage from champion attacks +150 Max Health +20 Armor +45 Move Speed
Block: Reduces damage from champion attacks by 10%. 1200
Plated Steelcaps TIPS: These boots provide reliable protection against champions who rely heavily on basic attacks. They increase your Health and Armor, while the passive further reduces damage taken from enemy champion attacks. An excellent choice against marksmen, AD fighters, and other auto-attack-focused champions.

Randuin's Omen
Counters Critical Strike Damage +400 Max Health +75 Armor
Resilience: Critically Struck deal 30% less damage to you.
Countercurrent: Gain 1 stacks of Countercurrent when Critically Struck by physical damage. Each stuck grants 5% Movement Speed and 5% slow resist. Max 4 stacks. 2800
Randuin's Omen TIPS: This item is built to counter crit-heavy builds. It provides a large health pool and armor while reducing damage from critical strikes, making you much tougher in head-on engagements. When you are critically struck, you gain stacks that boost your movement and slow resistance, helping you hold position and control fight spacing. — Perfect for tanks and bruisers who need to stand up to high-crit auto-attackers and survive extended teamfights.

Thornmail
Reflects damage and reduces enemy healing +200 Max Health +75 Armor
Thorns: When struck by an attack, deal 20 + 6% bonus Armor + 1% bonus Health magic damage to the attacker.
Entwine: Apply 50% Grievous Wounds to enemy champions for 3 second(s) when stuck by their attacks or dealing damage to them.
Grievous Wounds reduces the effectiveness of Healing and Regeneration effects. 2700
Thornmail TIPS: This item reflects a portion of incoming physical damage back to attackers as magic damage and applies an effect that reduces enemy healing effectiveness. A strong pick versus teams with heavy auto-attack damage and sustain — ideal for tanks and bruisers who need to absorb focus and cut down opponent healing.

Dead Man's Plate
Increases Movement Speed +350 Max Health +70 Armor +4% Movement Speed
Momentum: Moving builds Momentum, granting up to 40 Move Speed at 100 stacks. Attacking removes all Momentum. Stacks decay when movement is impaired.
Crushing Blow: Attacks deal up to 100 bonus magic damage based on Momentum removed. Melee attacks with max Momentum slows by 75% for 1 second. 2800
Dead Man's Plate TIPS: This item provides a substantial boost to health and armor, and its “Momentum” passive builds movement speed as you move—up to a cap—until you land an attack, which then triggers “Crushing Blow”, dealing bonus magic damage based on the momentum removed and slowing enemies at full stacks. This makes it an excellent choice for tanks and bruisers who need extra mobility to engage quickly and sustain through fights. Tips: ideal for champions who need to close distance and absorb damage; pairs extremely well with Spellblade items (e.g., Divine Sunderer) for additional burst damage on engage.

Frozen Heart
Reduces enemy Attack Speed +80 Armor +400 Max Mana +20 Ability Haste
Winter's Caress: Reduce the Attack Speed of enemy champions within 650 units of you by 25%. 2550
Frozen Heart TIPS: This item combines a large amount of Armor, additional Mana, and Ability Haste, providing strong protection against physical damage. Nearby enemy champions have their Attack Speed reduced, making it especially effective against marksmen and other opponents who rely heavily on frequent basic attacks. An excellent choice for tanks and fighters against attack-focused team compositions.
Reduce Attack Speed
Items that reduce RENGAR Attack Speed.

Warden's Mail
Reduces enemy's Attack Speed +35 Armor
Cold Steel: Reduce the Attack Speed of enemies by 15% for 1.5 seconds when struck by an attack. 1050
Frozen Heart
Reduces enemy Attack Speed +80 Armor +400 Max Mana +20 Ability Haste
Winter's Caress: Reduce the Attack Speed of enemy champions within 650 units of you by 25%. 2550
Frozen Heart TIPS: This item combines a large amount of Armor, additional Mana, and Ability Haste, providing strong protection against physical damage. Nearby enemy champions have their Attack Speed reduced, making it especially effective against marksmen and other opponents who rely heavily on frequent basic attacks. An excellent choice for tanks and fighters against attack-focused team compositions.
 Cleanse or Block Spells
Items with ability or property to cleanse or block negative spells.

Quicksilver Sash
Dispels crowd control
Quicksilver (Active): Removes all crowd control effects currently affecting you, and become immune to crowd control effects for 0.25 seconds.
Perseverance (Passive): When the Quicksilver effects ends, grant 30% Tenacity and 30% Slow Resist for 1.5 seconds. (60s Cooldown)
Cannot be used during knock up or knock back effects. 1100
Quicksilver Sash TIPS: This enchant instantly removes most crowd control effects and briefly grants immunity to further disables. Once the effect ends, it provides increased resistance to crowd control and slows, helping you escape dangerous situations or continue fighting without interruption. It is an excellent choice against teams with heavy crowd control, allowing you to stay mobile and effective in crucial moments.

Seeker's Armguard
Turn invulnerable +20 Armor +35 Ability Power
Stasis (Active): Become invulnerable and untargetable for 2.5 seconds, but unable to move, attack, cast abilities or use items. (120s Cooldown) 1200
Seeker's Armguard TIPS: This item combines Ability Power with extra defense, but its defining feature is the ability to become temporarily invulnerable. Its active effect lets you completely avoid lethal damage, dodge crucial enemy abilities, or buy time for your cooldowns to return. It is an excellent choice for mages and AP assassins who need to survive burst damage and outplay opponents in critical teamfights.

Zhonya's Hourglass
Turn invulnerable +40 Armor +110 Ability Power
Stasis (Active): Become invulnerable and untargetable for 2.5 seconds, but unable to move, attack, cast abilities or use items. (90s Cooldown) 3300
Zhonya's Hourglass TIPS: This item combines high Ability Power with extra armor, while its defining feature is the ability to become completely invulnerable for a short time. Its active effect allows you to survive lethal damage, avoid crucial enemy abilities, or buy time for your cooldowns to recover. It is an excellent choice for mages and AP assassins who need to outlive enemy focus and turn the tide of a teamfight.

Mercurial Scimitar
Dispels crowd control +45 Attack Damage +12% Lifesteal +40 Magic Resistance
Quicksilver Sash (Active): Removes all crowd control debuffs from you and grants immunity to crowd control for 0.25s.
Perseverance (Passive): When the Quicksilver effects ends, grant 30% Tenacity and 30% Slow Resist for 1.5 seconds. (60s Cooldown)
Cannot be used during knock up or knock back effects. 3100
Mercurial Scimitar TIPS: This item is designed to counter crowd control. Its active removes most disabling effects and briefly grants immunity to follow-up control, while the passive provides additional resistance to crowd control and slows once the effect ends. It is an excellent choice for marksmen, fighters, and assassins who need to maintain their mobility and keep dealing damage against heavy-CC team compositions.
Edge of Night
Blocks an enemy ability +250 Max Health +50 Attack Damage
Gouge: +12 Armor Penetration.
Annul: Grants a spell shield that blocks the next hostile ability. This spell shield refreshes upon leaving combat with enemy champions. (35 second cooldown) 3000
Edge of Night TIPS: This item is perfect for champions who need a mix of offense and defense. It provides bonuses to maximum health and attack damage, along with increased armor penetration to help you shred through enemy defenses. The "Annul" effect grants you a spell shield, blocking the next enemy ability. This spell shield refreshes when leaving combat with enemy champions, making the item a great choice for champions who need protection from crowd control and to engage in fights, such as Ashe, Lux, or Morgana.

Cleanse
Removes disables (including spell debuffs) affecting your champion and grants immunity to disables for 0.25 seconds.
Cooldown: 110s
Reduces Mobility
Items that can decrease RENGAR mobility.

Exhaust
Exhausts target enemy champion, reducing their Movement Speed by 35% and their damage dealt by 40% for 2.5 seconds.
Cooldown: 100s

Serylda’s Grudge
Armor Penetration (%) and apply slows +50 Attack Damage +35% Armor Penetration +15 Ability Haste
Icy: Damaging active abilities and empowered attacks slow enemies below 60% current Health by 30% Movement Speed for 1 second. 3100
Serylda’s Grudge TIPS: This item significantly increases physical damage through percentage Armor Penetration while allowing you to use abilities more frequently. Damaging wounded enemies with active abilities or empowered attacks also slows them, making it easier to chase or keep targets at a distance. An excellent choice for AD champions who rely on abilities and need effective Armor Penetration combined with additional control.

Rylai's Crystal Scepter
Abilities apply slows +350 Max Health +65 Ability Power
Icy: Damaging abilities and empowered attacks slow enemies by 30% for 0.75 second. 2700
Rylai's Crystal Scepter TIPS: This item enhances your crowd control by causing your abilities and empowered attacks to slow enemies with every hit. The bonus health improves your durability, while the consistent slow makes it much easier to land follow-up abilities, chase fleeing targets, and support your teammates. It is an excellent choice for damage-over-time mages and champions who rely on keeping enemies within the range of their abilities.

Iceborn Gauntlet
Attacks create a slowing field +300 Max Health +50 Armor +250 Max Mana +30 Ability Haste
Spellblade: Using an ability causes your next attack within 10 seconds to deal bonus physical damage equal to (100% base AD + 25% Bonus Armor ) in an area and creates an icy field for 2 seconds that slows by 30%. Armor increases the size of the icy field. (1.5s Cooldown)
Damage is reduced vs structures. 3000
Iceborn Gauntlet TIPS: This item greatly boosts your health, armor, mana, and ability haste, making you much tankier. After casting an ability, your next attack in an area deals bonus physical damage and creates an icy field that slows enemies inside by 30%. The field’s size scales with your armor. This makes the item a great choice for champions who want to combine high survivability with crowd control and extra AOE damage.

Stridebreaker
Slows enemies nearby after a short dash +400 Max Health +40 Attack Damage +25% Attack Speed
Breaking Shockwave (Active): Activate to dash a short distance, dealing 100% AD as Physical Damage to nearby enemies and slowing them by 40% for 3s (25s cooldown)
Stride (Passive): Gain 20 Movement Speed for 2 second(s) when you deal physical damage. 3100
Stridebreaker TIPS: This item combines mobility, damage, and crowd control, making it easier to stick to your targets. Its active lets you dash a short distance, damage nearby enemies, and heavily slow them, while the passive grants bonus movement speed whenever you deal physical damage. It is an excellent choice for fighters and bruisers who want to engage quickly, chase down opponents, and keep enemies within melee range.
Gain a Shield
Gives you a shield that increases your chances of survival against RENGAR.
Sterak's Gage
Taking damage triggers a shield +400 Max Health +20% Tenacity
Heavy Handed: +50% base Attack Damage as bonus Attack Damage.
Lifeline: Damage that puts you under 35% Health grants a shield that equal to 75% of your bonus health that decays over 5 seconds (70s Cooldown).
Sterak's Fury: Triggering Lifeline increases size and grants 30% Tenacity for 8 seconds. 3200
Sterak's Gage TIPS: This item combines a large amount of Health, crowd control resistance, and additional Attack Damage based on the champion's base Attack Damage. When your Health drops to a critical level, it grants a powerful shield that scales with bonus Health and temporarily provides even more Tenacity. An excellent choice for fighters and other AD champions who need additional survivability in extended and intense fights.

Locket of the Iron Solari
Team shield +200 Max Health +30 Armor +30 Magic Resistance +10 Ability Haste
Locket (Active): Grants a shield to yourself and nearby allied champions that each absorbs 250-370 damage for 2.5 seconds. (60s Cooldown)
This effect is reduced by 50% if the target has been affected by another Locket in the last 20 seconds. 2600
Locket of the Iron Solari TIPS: This item provides powerful team-wide protection during fights. Its active grants a shield to you and nearby allies, helping your team survive burst damage and reducing the impact of enemy engages. It is an excellent choice for tanks and supports who stay close to their teammates and want to maximize their team's survivability in teamfights.

Gargoyle Stoneplate
Shield +200 Max Health +45 Armor +45 Magic Resistance +10 Ability Haste
Stoneplate (Active): Gain a base shield that absorbs damage equal to 100 plus 90% bonusand gain size, decayng over 2.5s. (60s Cooldown) 2900
Gargoyle Stoneplate TIPS: This item greatly increases your survivability during teamfights. Its active grants a powerful shield that scales with your bonus Health, allowing you to withstand heavy focus fire and remain on the frontline longer. It is an excellent choice for tanks and bruisers who need to absorb large amounts of damage while protecting their team.
Reveals the Enemy
Items that help detect invisible enemies or enemies out of sight.
Trinket: Sweepieng Lens
Scans around you, warning against hidden enemies, revealing invisible traps and revealing/disabling nearby enemy wards for 10 seconds.
Cooldown: 75s

Trinket: Control Ward
Places a visible ward that grants vision and reveals nearby wards, traps and camouflaged champions.
Tap castinbg prioritizes placing wards in brush you are within range of walking towards.
Cooldown: 100s
Jungle RENGAR Strengths and Weaknesses
Jungle RENGAR Strategy and Tactics
Jungle RENGAR Power Spikes
RENGAR Jungle Pathing
Jungle Pathing represents the choices Junglers make in regards to when and where to gank. These choices include how they involve farming camps and buffs between their ganks, anticipating counterganks, and looking for opportunities to invade. It involves understanding the different abilities the champions in the game have and how they interact, as well as the overall interactions between the two team compositions.
full camp clear with a Red Buff start


Gromp
Monster ABOUT
ABOUT
Spawn time: 20 second(s) into game.
Respawn interval: 110 second(s).
REWARDS
Earn XP and gold upon defeating them.

Blue Sentinel
Large Monster ABOUT
ABOUT
Spawn time: 20 second(s) into game.
Respawn interval: 150 second(s).
The Blue Sentinel, sometimes called the blue buff, is a common starting monster for junglers thanks to its powerful Crest of Insight buff.
REWARDS
Upon dealing the killing blow to the Blue Sentinel, the player will receive the Crest of Insight Buff effect that lasts 90 seconds. Recover an amount of Mana or Energy every second.
Get 15 Ability Haste.
When a player who possesses the Crest of Insight buff is defeated by an enemy champion, the buff is transferred to the champion who defeated that player.

Greater Murk Wolf
Monster ABOUT
ABOUT
Spawn time: 20 second(s) into game.
Respawn interval: 110 second(s).
Wolves tend to be easier and safer to bees at than other monsters. They are commonly s ight by junglers when passing by or while the higher priority monsters are respawning.
REWARDS
Earn XP and gold upon defeating them.

Crimson Raptor
Monster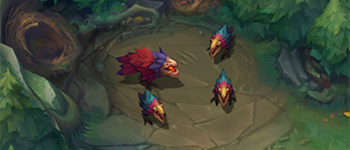 ABOUT
ABOUT
Spawn time: 20 second(s) into game.
Respawn interval: 110 second(s).
Crimson raptors deal surprising damage t but the small ones can be quickly dispatched. Junglers commonly seek them out while pre| to gank the middle lane or while waiting for hi; priority monsters to spawn.
REWARDS
Earn XP and gold upon defeating them.

Red Brambleback
Large Monster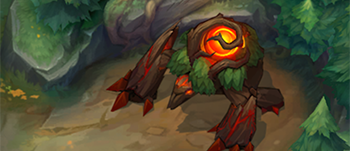 ABOUT
ABOUT
Spawn time: 20 second(s) into game.
Respawn interval: 150 second(s).
After completing the final strike to the Red Brambleback, you can obtain the Crest of Cinders buff effect; when the player with this buff is defeated, the buff effect will be transferred to the enemy champion who defeated them.
REWARDS
Upon dealing the killing blow to the Red Brambleback, the player will receive the Crest of Cinders Buff that lasts 90 seconds.
For Melee Champions, basic attacks burn targets on hit, reducing their movement speed by 20% for 3 seconds, and dealing True Damage every second. For non-Champion units, this only deals 50% of the burn damage.
For Ranged Champions, basic attacks burn targets on hit, reducing their Movement Speed by 6% for 3 seconds, and dealing True Damage every second. For non-Champion units, this only deals 50% of the burn damage.
When a player who possesses the Crest of Cinders buff is defeated by an enemy champion, the bufs is transferred to the champion who defeated player.

Ancient Krug
Monster ABOUT
ABOUT
Spawn time: 20 second(s) into game.
Respawn interval: 110 second(s).
Ancient Krugs split into two upon defeat until they are so small they can split no more. Junglers oftem fight these monsters for extra gold and XP while waiting for gank opportunities or higher priority monster spawns.
REWARDS
Earn XP and gold upon defeating them.

Rift Scuttler
Large Monster ABOUT
ABOUT
Spawn time: 85 second(s) into game.
Respawn interval: 120 second(s).
REWARDS
The Rift Scuttler grants XP and gold on takedown. A Speed Shrine also spawns at a fixed location on the same side of the river which provides the following buffs to your team:
Grants vision of the area.
Vision radius: 4.5m. Enemy champions who pass through this area will be maked and revealed.
Allied champions who pass through the area receive a 40% out-of-co Movement Speed boost for 2 second(s).


The Pro Rengar Jungle Path features a full jungle clear with a start on the Red Buff. Kill the Red Brambleback with (Q) SAVAGERY at level one. Unlock (W) BATTLE ROAR at level two as it helps clear the Krugs & Raptors much faster. Next up move towards the Blue Buff side of the jungle. After the Krugs and Raptors kill, unlock (E) BOLA STRIKE and head over the the other side of the jungle. There you'll clear the Murk Wolves, Gromp and Blue Sentinel & head over to the Rift Scuttler. Once the Scuttler has been cleared, most Rengar players tend to reset and keep power farming until level 5, but if there's a free kill on a lane they'll always do a quick gank and take it.
This Rengar Jungle Clear is very popular and getting a leash from your team will help speed it up so that you don't miss out on the Rift Scuttler kill.
Solo Baron RENGAR Build items and runes
The information below will help you get familiar with the game on the Solo Baron Line RENGAR. We have prepared a items builds, runes, summoner spells and ability order for a comfortable game. Situational options for replacing items and runes are also available to you.
Coming soon..
This section is currently empty, but we assure you that we are working tirelessly to fill this section!

Solo Baron RENGAR Counters
We have prepared lists of champions that can really annoy you during a match with the game on the Solo Baron RENGAR. We have also prepared a list of champions with whom you will be comfortable being on the same team. These lists are relative and depend greatly on your level of play, the skills of your allies and opponents. Do not forget that each situation is individual!
Coming soon..
This section is currently empty, but we assure you that we are working tirelessly to fill this section!
Solo Baron RENGAR Counter Items
We have prepared a list of items and spells that will help counter Solo Baron RENGAR in a given situation. Buy items wisely, only if it is really necessary for a specific situation!
Coming soon..
This section is currently empty, but we assure you that we are working tirelessly to fill this section!
Solo Baron RENGAR Tips
Coming soon..
This section is currently empty, but we assure you that we are working tirelessly to fill this section!
Solo Baron RENGAR Strengths and Weaknesses
Coming soon..
This section is currently empty, but we assure you that we are working tirelessly to fill this section!
Solo Baron RENGAR Strategy and Tactics
Coming soon..
This section is currently empty, but we assure you that we are working tirelessly to fill this section!
Solo Baron RENGAR Power Spikes
Coming soon..
This section is currently empty, but we assure you that we are working tirelessly to fill this section!
Jungle (V3) RENGAR Build items and runes
The information below will help you get familiar with the game on the Jungle (V3) Line RENGAR. We have prepared a items builds, runes, summoner spells and ability order for a comfortable game. Situational options for replacing items and runes are also available to you.
Coming soon..
This section is currently empty, but we assure you that we are working tirelessly to fill this section!
Jungle (V3) RENGAR Counters
We have prepared lists of champions that can really annoy you during a match with the game on the Jungle (V3) RENGAR. We have also prepared a list of champions with whom you will be comfortable being on the same team. These lists are relative and depend greatly on your level of play, the skills of your allies and opponents. Do not forget that each situation is individual!
Coming soon..
This section is currently empty, but we assure you that we are working tirelessly to fill this section!
Jungle (V3) RENGAR Counter Items
We have prepared a list of items and spells that will help counter Jungle (V3) RENGAR in a given situation. Buy items wisely, only if it is really necessary for a specific situation!
Coming soon..
This section is currently empty, but we assure you that we are working tirelessly to fill this section!
Jungle (V3) RENGAR Tips
Coming soon..
This section is currently empty, but we assure you that we are working tirelessly to fill this section!
Jungle (V3) RENGAR Strengths and Weaknesses
Coming soon..
This section is currently empty, but we assure you that we are working tirelessly to fill this section!
Jungle (V3) RENGAR Strategy and Tactics
Coming soon..
This section is currently empty, but we assure you that we are working tirelessly to fill this section!
Jungle (V3) RENGAR Power Spikes
Coming soon..
This section is currently empty, but we assure you that we are working tirelessly to fill this section!
Wild Rift RENGAR Ability and Tips
UNSEEN PREDATOR
SAVAGERY
BATTLE ROAR
BOLA STRIKE
THRILL OF THE HUNT
(PASSIVE) UNSEEN PREDATOR
If Rengar is in brush or camouflaged, leaps to the target within his next attack.
If Rengar's Ferocity is lower than 4 and he doesn't have any Ferocity gained from attacks during the attack, he gains 1 Ferocity.Bonetooth Necklace: Gains 4/8/12/16/20% Attack Damage for each unique champion takedown (+4/8/12/16/20% at takedown). Each enemy champion only provides this once.
- Gains 1 Ferocity upon casting a basic ability (if casting Savagery, Rengar must hit a target with an empowered attack to gain this bonus).
- Reaching 4 Ferocity empowers his next basic ability. Casting the empowered ability does not refresh thee basic ability's cooldown.
- Gains 30% Movement Speed (increases at level 1/6/11) for 1.5 seconds upon casting an empowered ability.
- All Ferocity is lost 8 seconds after leaving combat.
Ability Tips
Video
(Q) SAVAGERY
5,5/5/4,5/4s
Rengar's next 2 attacks within 3 seconds gain 40% Attack Speed. The first attack is empowered to deal an additional 44 physical damage (40/80/120/160 + 5/10/15/20% ) and will Critically Strike.
Rengars Critical Rate also increases the damage of the first attack by 0% - 55%, reaching maximum bonus damage gaines this way at 100% Critical Rate.Ferocity: Gains 40%–115% Attack Speed for 5 seconds instead. The first attack deals an additional 65 physical damage (40/80/120/160 + 40% ) instead.
Deals 60% damage to turrets.
Ability Tips
Video
(W) BATTLE ROAR
16/14/12/10s
Rengar roars, dealing 60 magic damage (60/100/140/180 + 80% ) and healing for 60% of damage taken in the last 2 seconds.Ferocity: Deals 80 magic damage (80/100/110/130 + 80% ) instead. Also restores Health by 60% of damage taken in the last 2 seconds and removes all crowd control effects from himself.
Damage from a monster restores Health by 100% of the damage taken instead.
Ability Tips
Video
(E) BOLA STRIKE
10s
Throws a bola that deals 70 physical damage (70/130/190/250 + 70% bonus ) and slowing the target struck by 30/50/70/90% for 1.75 seconds. The bola also reveals the surrounding area for 2 seconds.Ferocity: Deals 75 physical damage (75/110/145/180 + 70% bonus ) and roots the target for 1.75 seconds. Also reveals the target and surrounding area for 2 seconds.
Bola Strike can be cast while Rengar is leaping.
Ability Tips
Video
(R) THRILL OF THE HUNT
85/75/65s
Gains 40/50/60% Move Speed and reveals the nearest enemy champion for 12/14/16 seconds.
Rengar becomes camouflaged after 1 second and his next attacks shreds the target's armor by 16/24/32 for 4 seconds.
Ability Tips
Video
Wild Rift RENGAR Skills Combo
Rengar Maximum Burst
Execution

Use this combo to deal maximum burst damage possible.
Stack your Ferocity to max on a jungle camp. Use (R) THRILL OF THE HUNT to approach the nearest enemy. Once in range, activate your empowered (Q) SAVAGERY and AA to jump on the enemy. Buffer your (E) BOLA STRIKE and (W) BATTLE ROAR during the process. Upon landing, use empowered (Q), then continue to AA.
Combo Video
Wild Rift RENGAR Video
Watch here!Rengar is a ferocious vastayan trophy hunter who lives for the thrill of tracking down and killing dangerous creatures. He scours the world for the most fearsome beasts he can find, especially seeking any trace of Kha'Zix, the void creature who scratched out his eye. Rengar stalks his prey neither for food nor glory, but for the sheer beauty of the pursuit.